


As promised I finally got my act together to finish our upstairs bathroom! Woohoo! Technically, this was the first room we finished in the house because well, you kind of can’t live in one without a functioning bathroom. But it’s taken me a long time (ok, over a year!) to pull together the final touches. At last I feel like it’s come together enough to present to the world as a ‘finished’ bathroom project. It’s nothing extravagant or fancy, it’s just a bright and practical space that we renovated ourselves and are happy to set foot in every day. But before I get gabbing about the choices we made here are a few before shots to give you some perspective on the changes that took place.
BEFORE
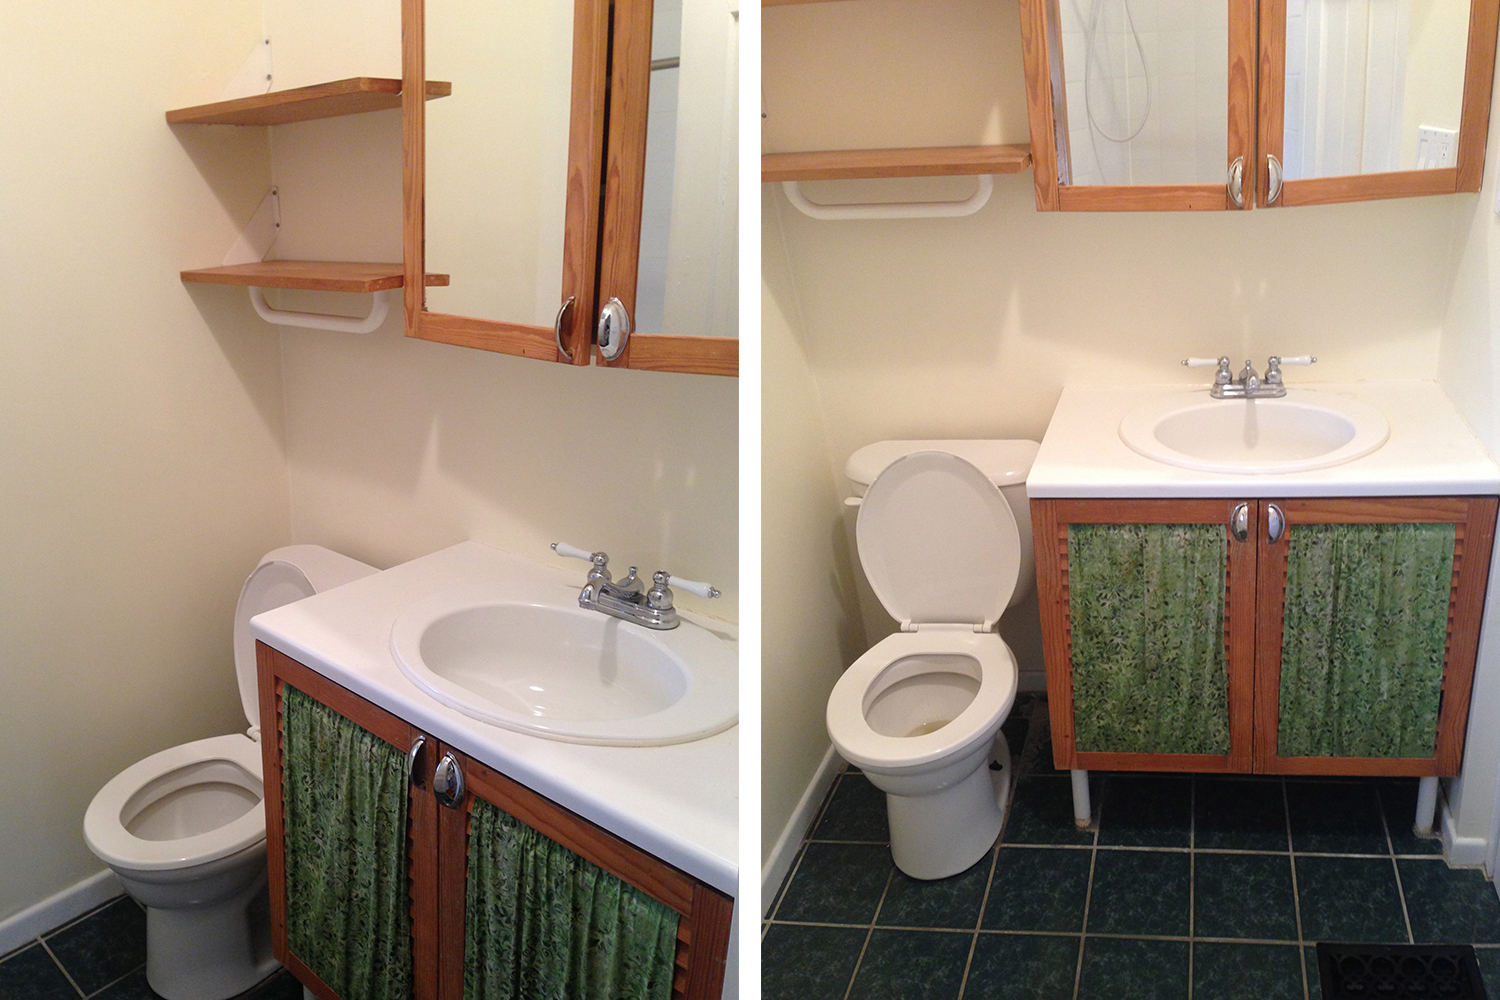
Soooo, yikes, right? Honestly, I feel like these photos are actually flattering compared to my real-life recollection of the bathroom when we moved in. It seemed much grimier and more beaten up than it looks but regardless it’s pretty rough at best. How about those curtains, over top of, wood slat cupboard doors? But I mean, the dark green colour scheme has merit….no? Yeah, no. Add a tiny tub, tiny toilet and lots of wood grain texture and you’ve got reno project just begging to be ripped out. Oh and don’t forget the barely functional, ready to fall apart, storage unit just outside the door. Forgot your towel, tough luck, you’re going out there!
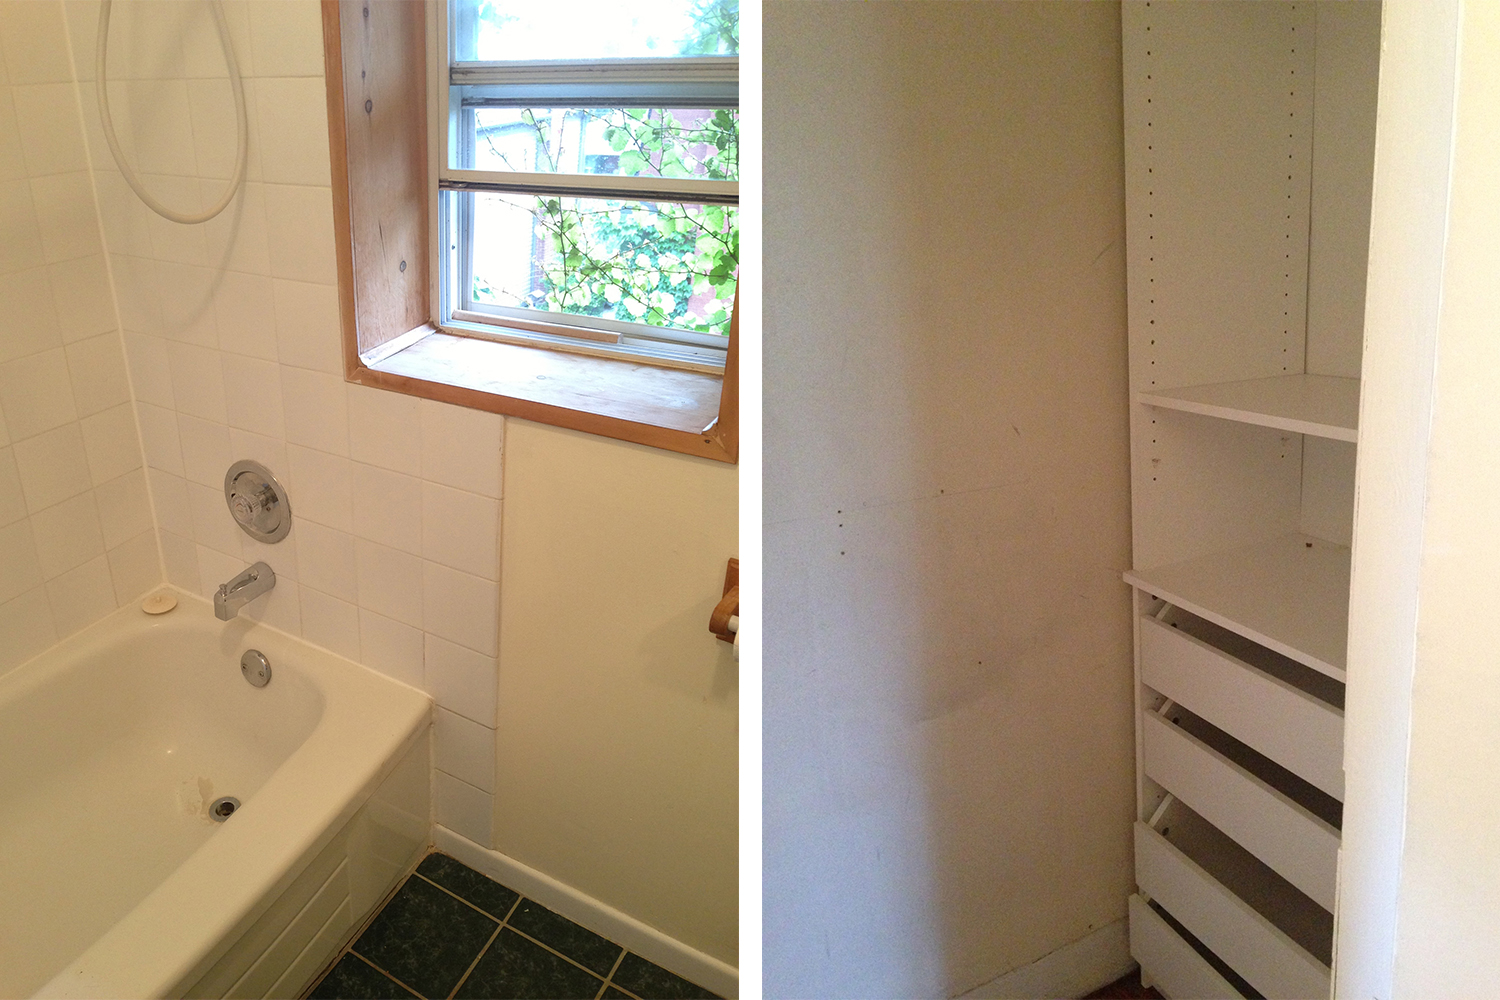
All joking aside, there are plenty of far worse bathrooms out there, but there was no band-aid DIY projects that would make us happy with this one. We bought the house knowing we’d be renovating everything. The bathroom was just the most obvious place to start. We gutted it down to the studs (you don’t want to know what we found under the tub or in the walls!), redid all the plumbing and electrical and ended up knocking out and shifting over the entry wall (to the right when you’re facing the sink). It was our first major project and involved the steepest learning curve but we are so please with the result. Which brings me to the….
AFTER
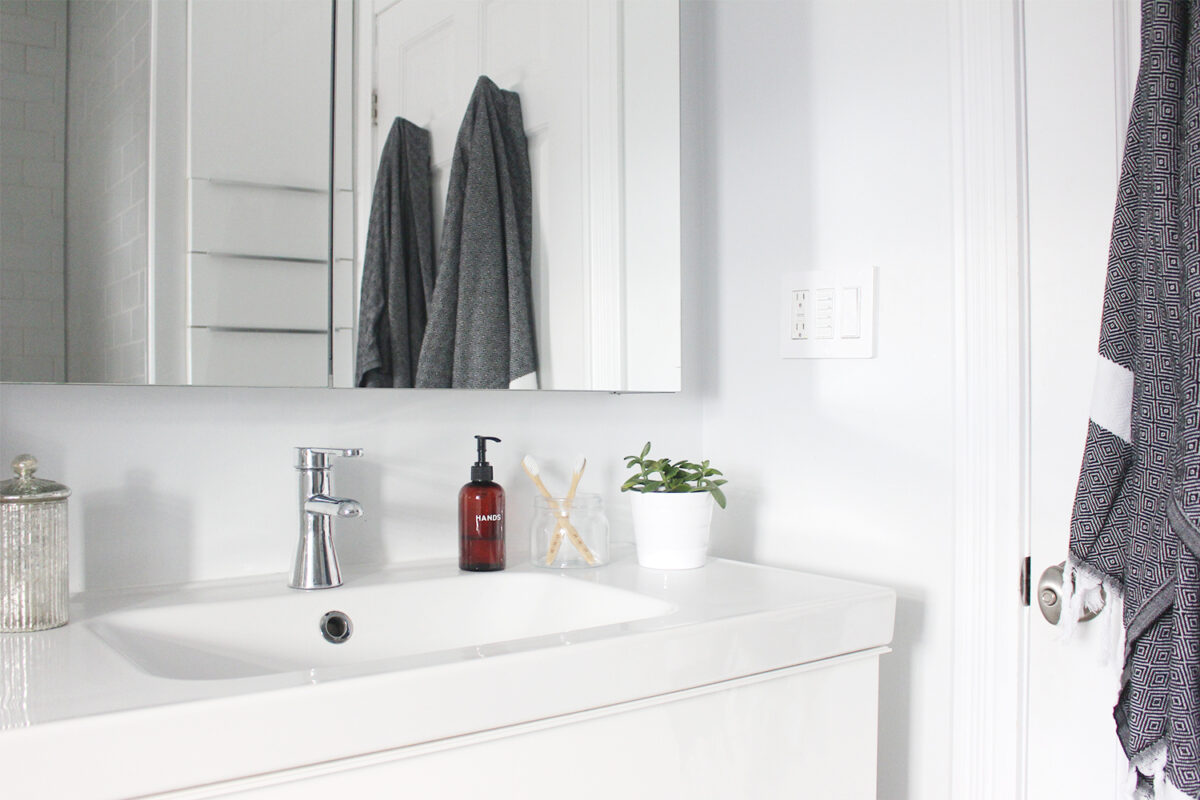
Our goal was to optimize the amount of natural light that comes in through the window, maximize storage and create a functional space that was both relaxing and practical. We stuck to a serene white and grey colour palette and brought in some darker accents through artwork and accessories like towels, soap bottles and plants pots. We invested in a great tub, toilet, shower hardware and a new window and saved a bit by opting for super simple but solid IKEA cabinets. After a year of use the only thing that is showing it’s age is the floor but that’s carrara marble for you. So pretty but not super durable. So I’ll take you on a little tour, and I mean little (this room is tiny!), and share a bit about all the elements that went in to making this bathroom our little spa sanctuary.

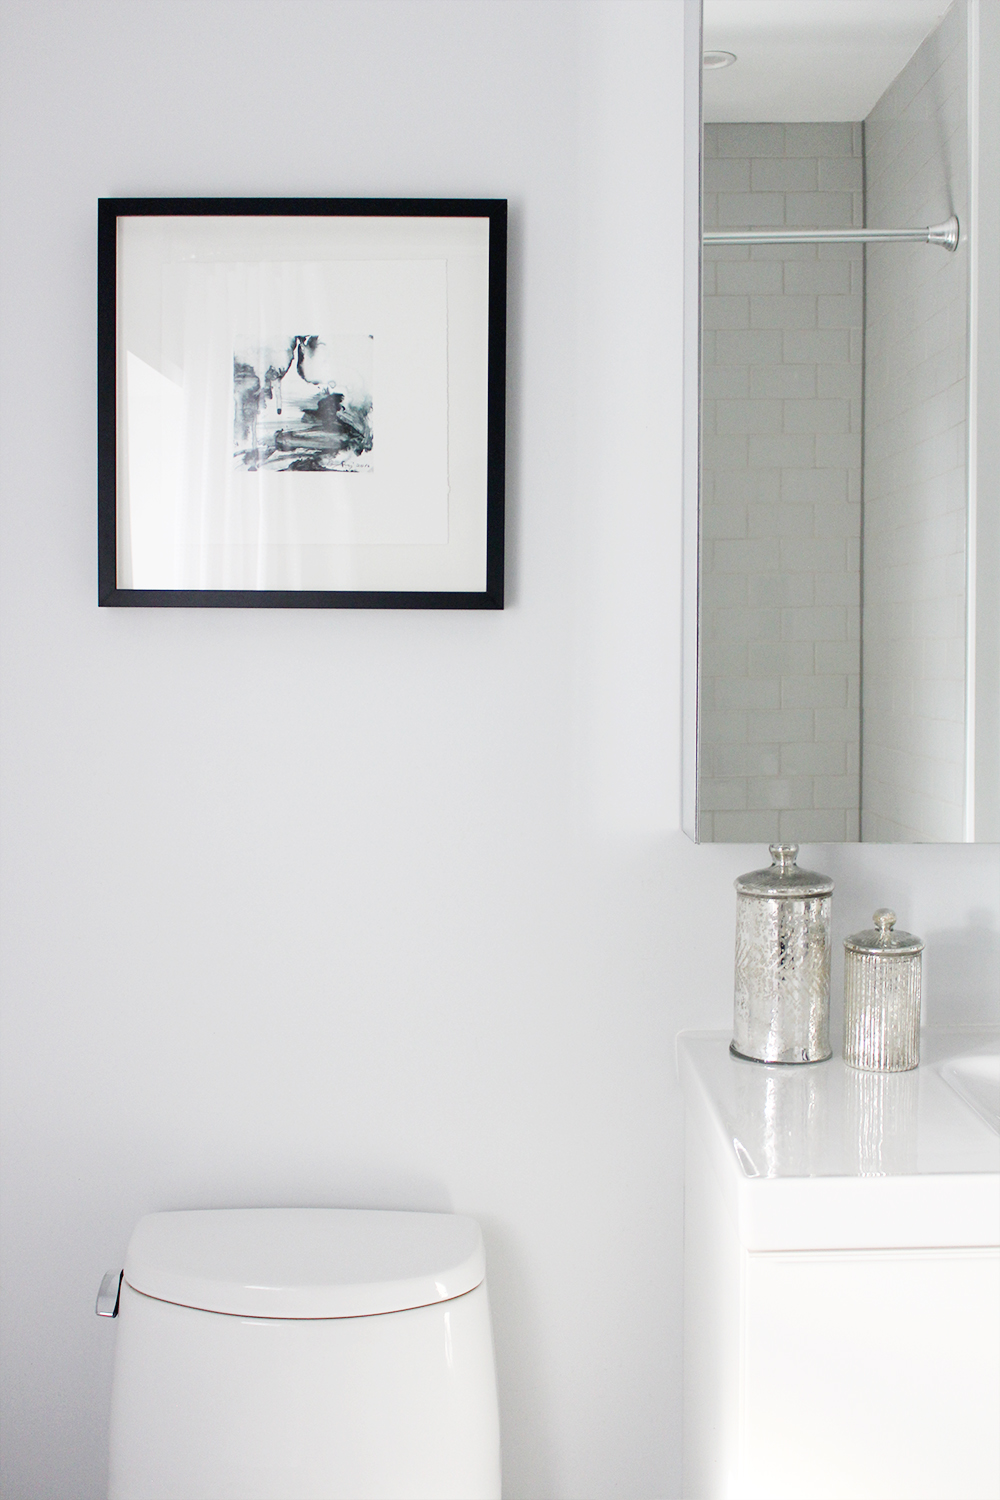
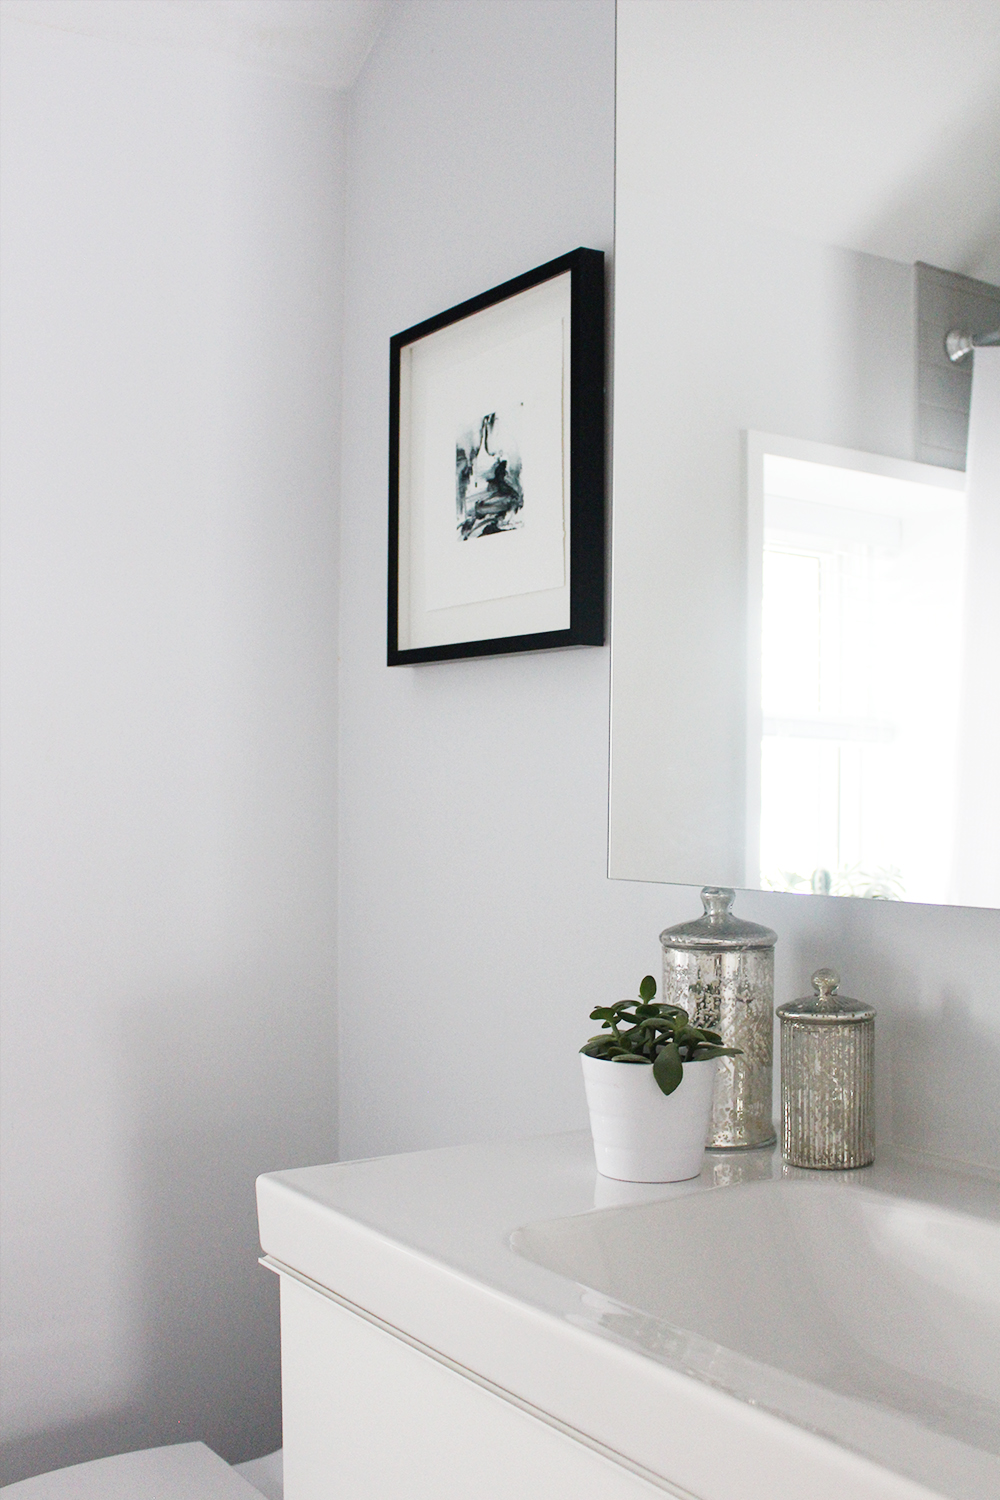
1 | Character. Our house was built in 1890 and while we love a super clean aesthetic, we wanted to incorporate elements of it’s original era. We found this stained glass transom window at a vintage stained glass market and loved the life it brings to the room. It’s also great for letting a little more light in when the door is closed. It’s one of the first things people notice and sets the space apart from your typical modern bathroom.
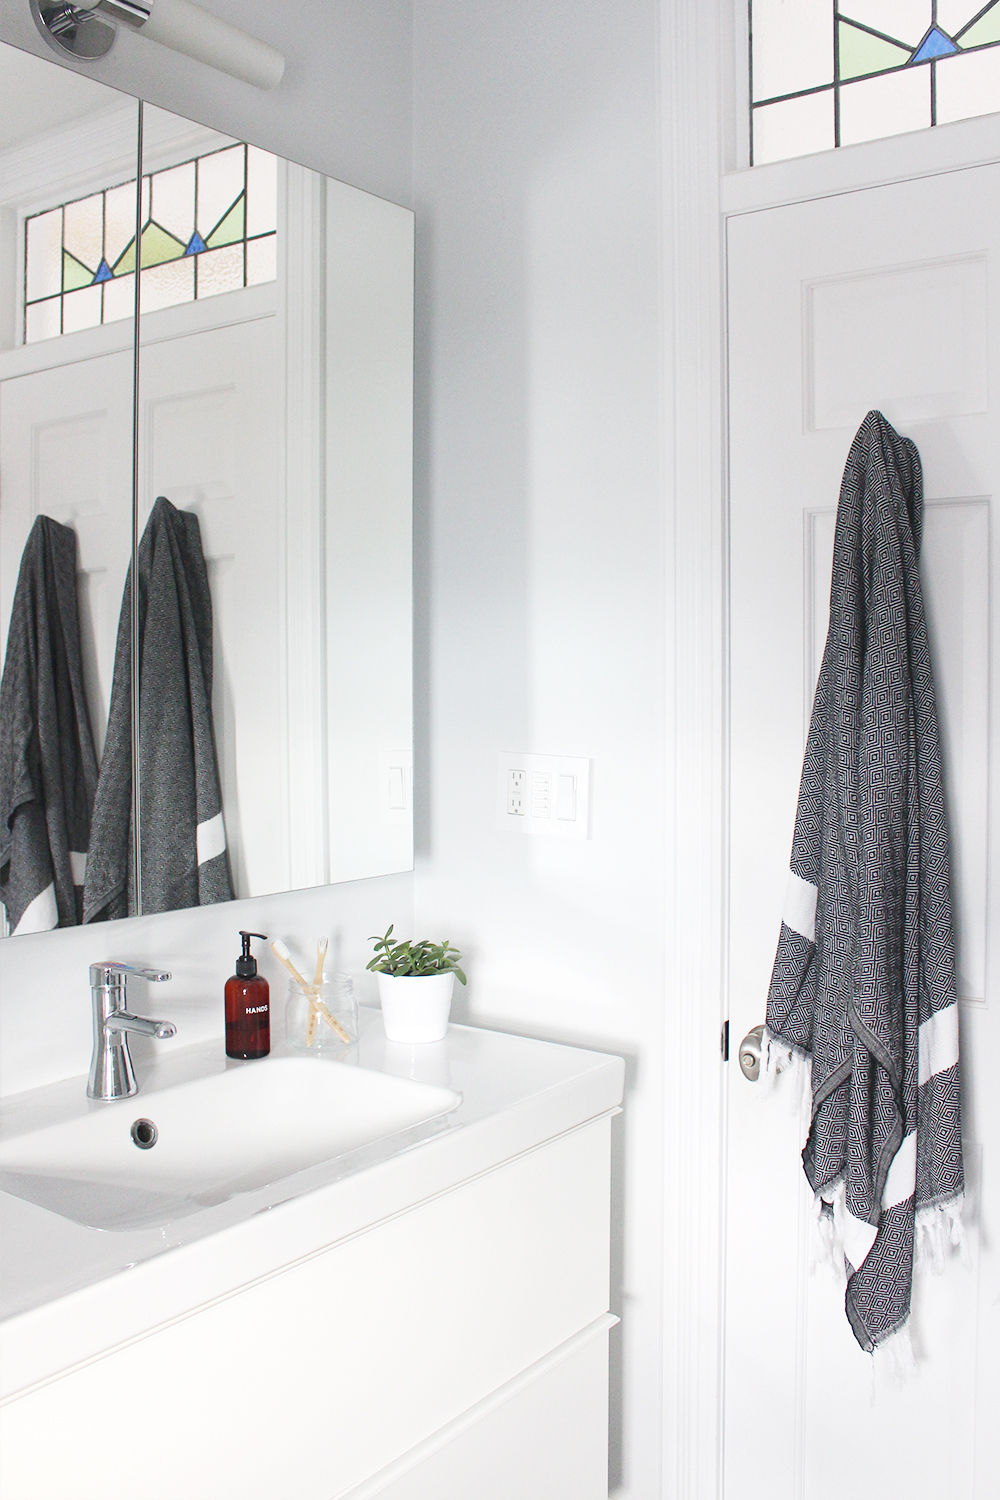
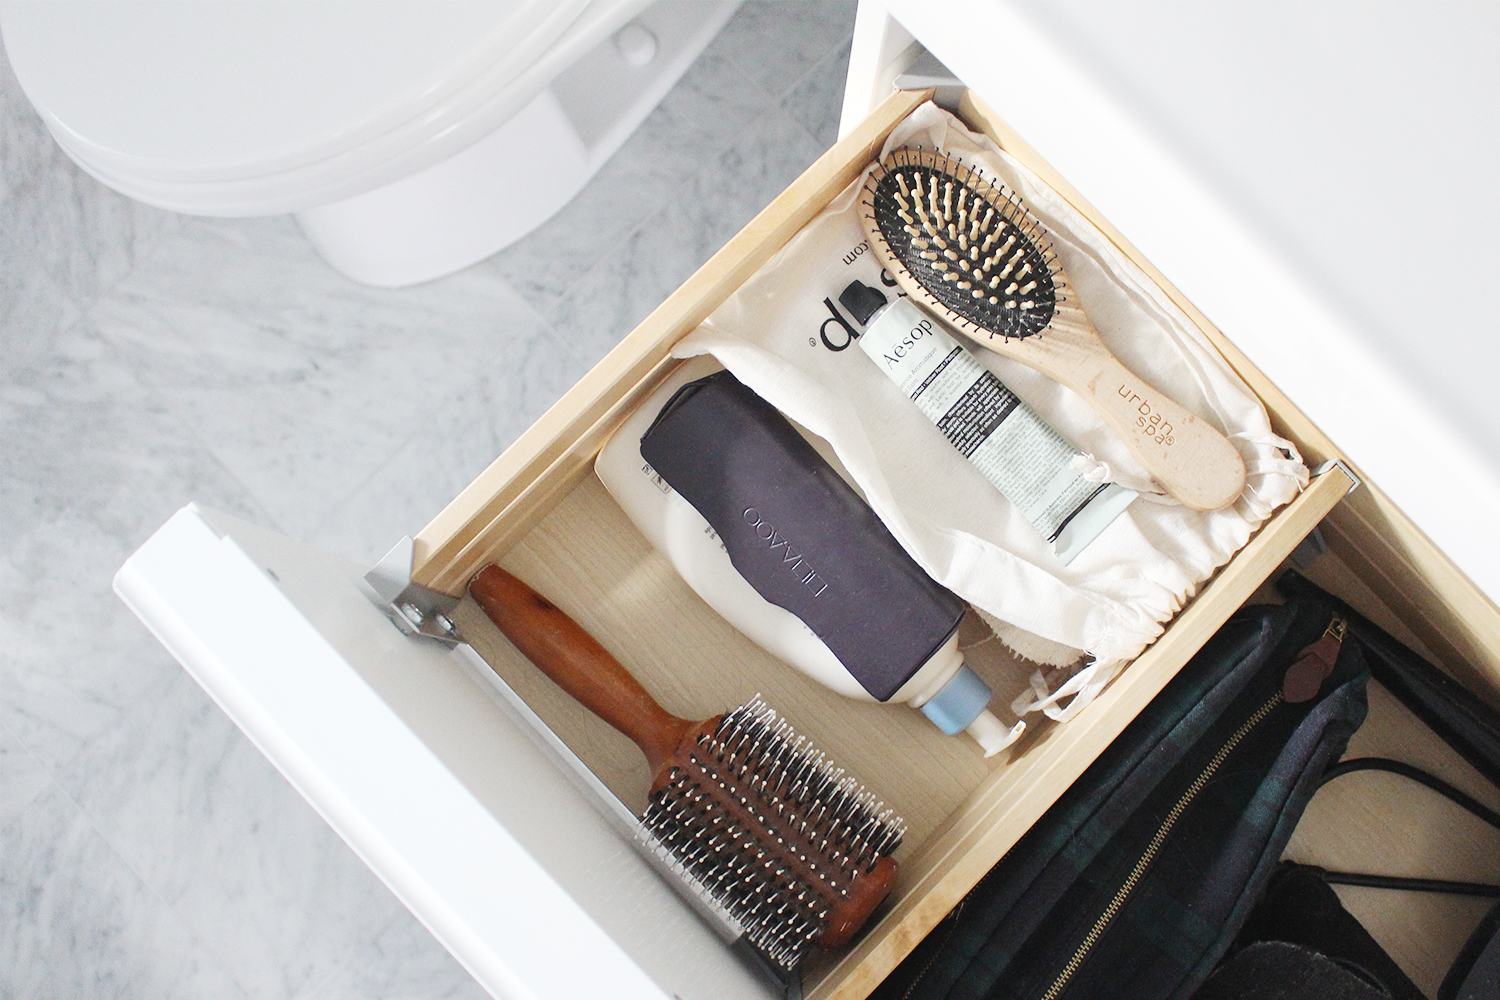
2 | Storage. Anyone who’s lived in an old house knows how scarce storage can be so we knew we had to make the most out of our options. The GODMORGON sink and mirror cabinet from IKEA was a great option for us. We can easily tuck away all our bathroom goods so the counter stays clutter free (for the most part). It’s a floating unit so gives the illusion of more floor space too. We also used IKEA kitchen cabinets for more storage behind the door to house our towels, linens and garbage. These were an absolute nightmare to install (it was a major hack) but the result looks pretty damn good I must admit.
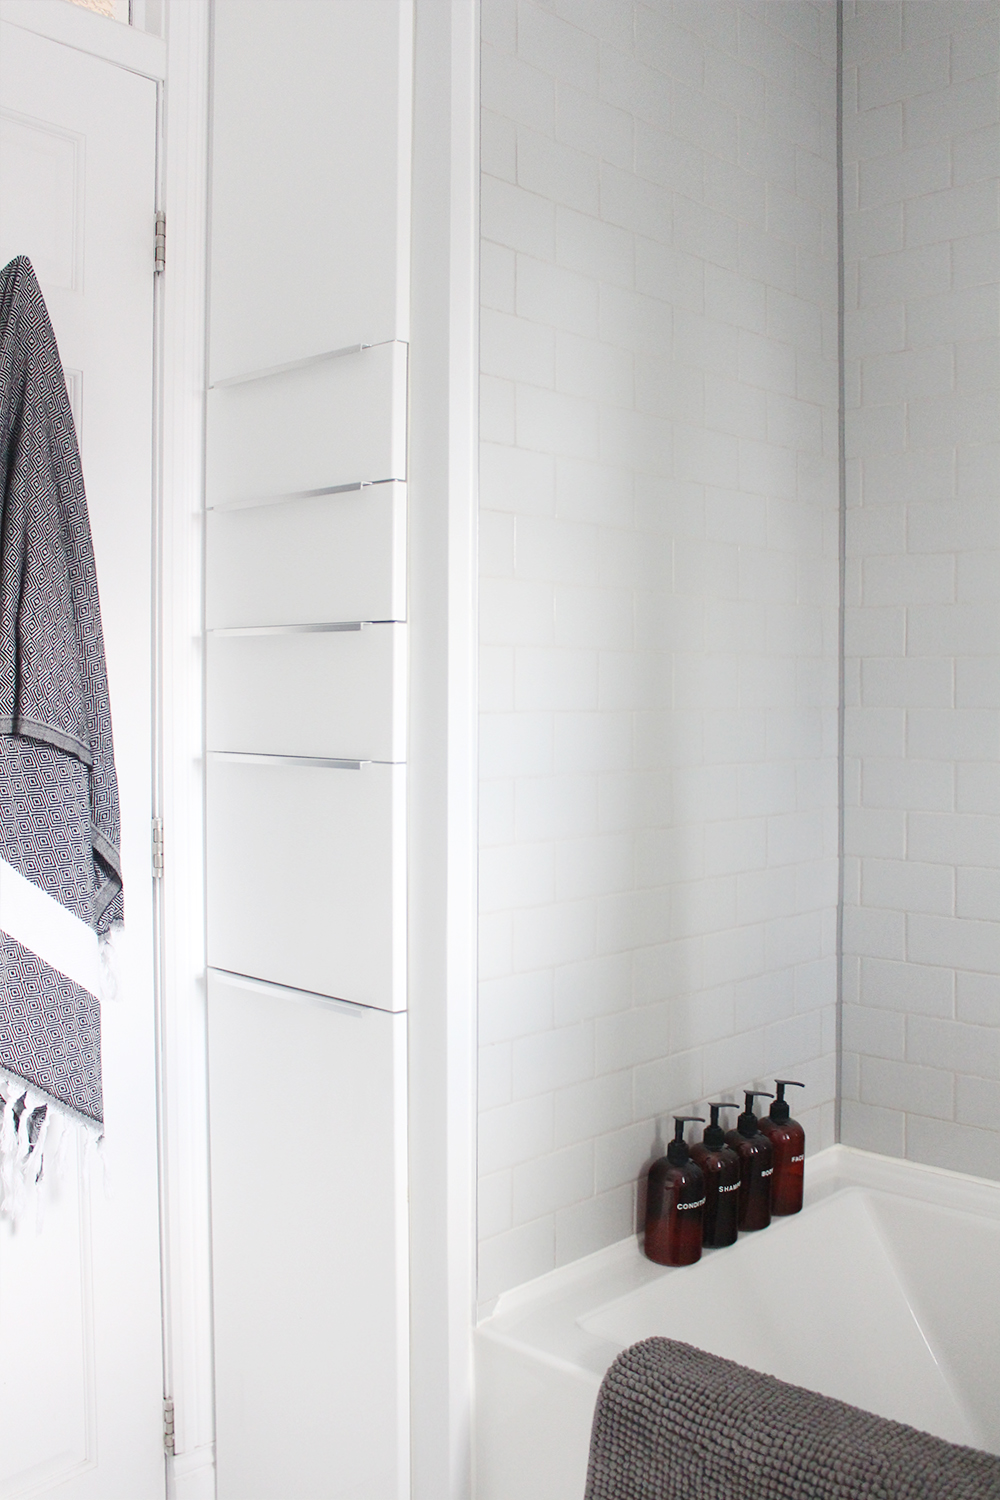
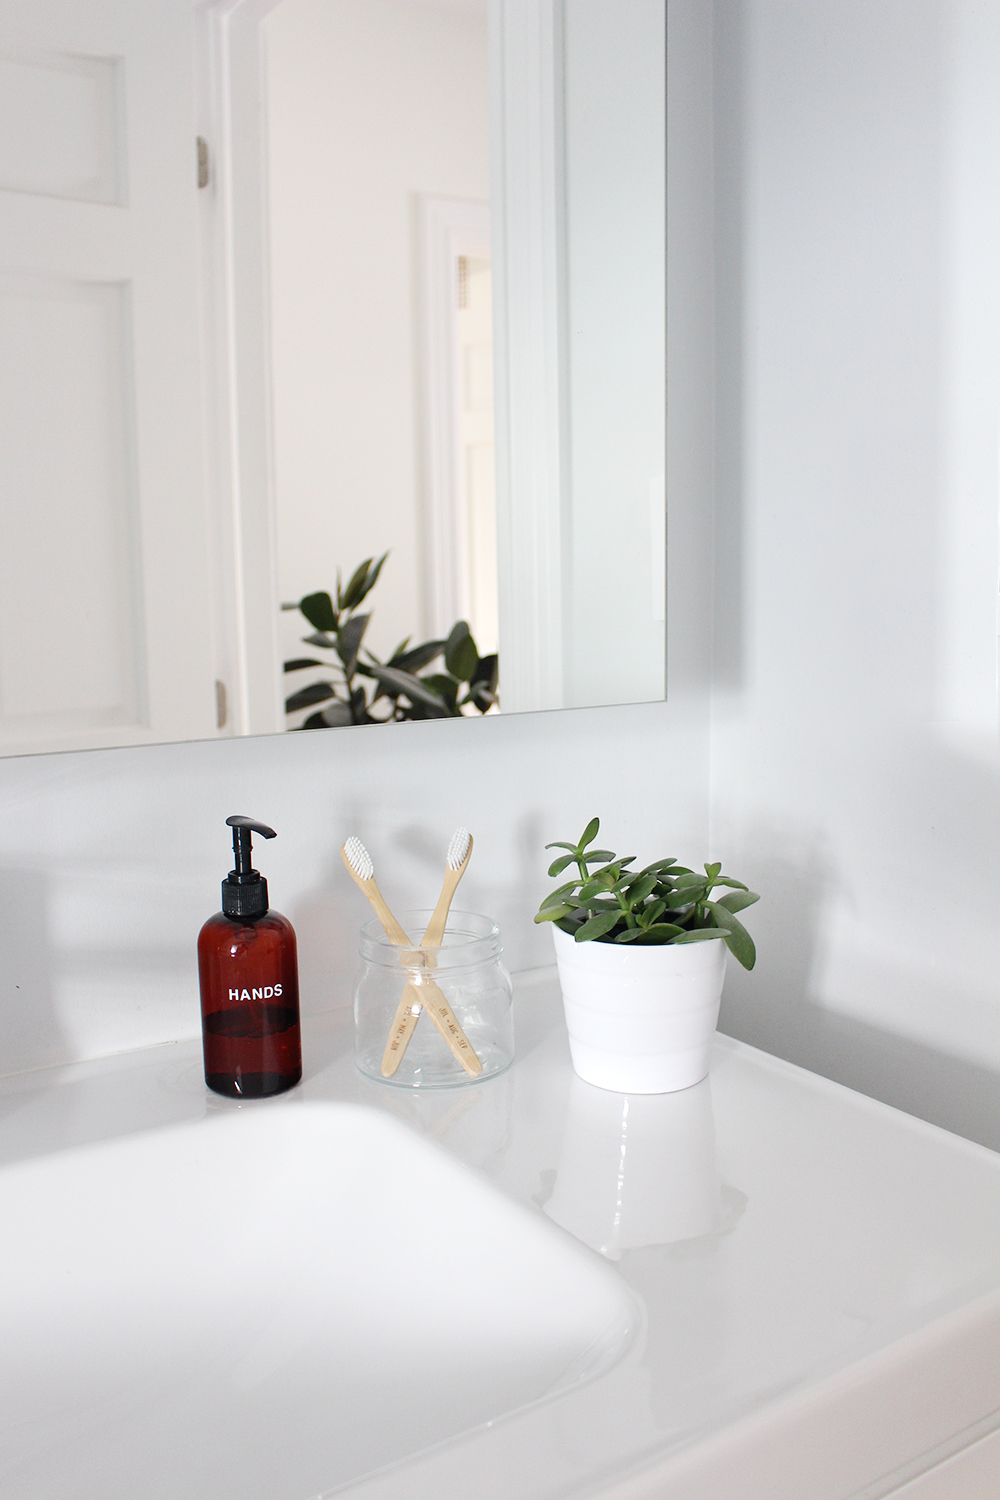
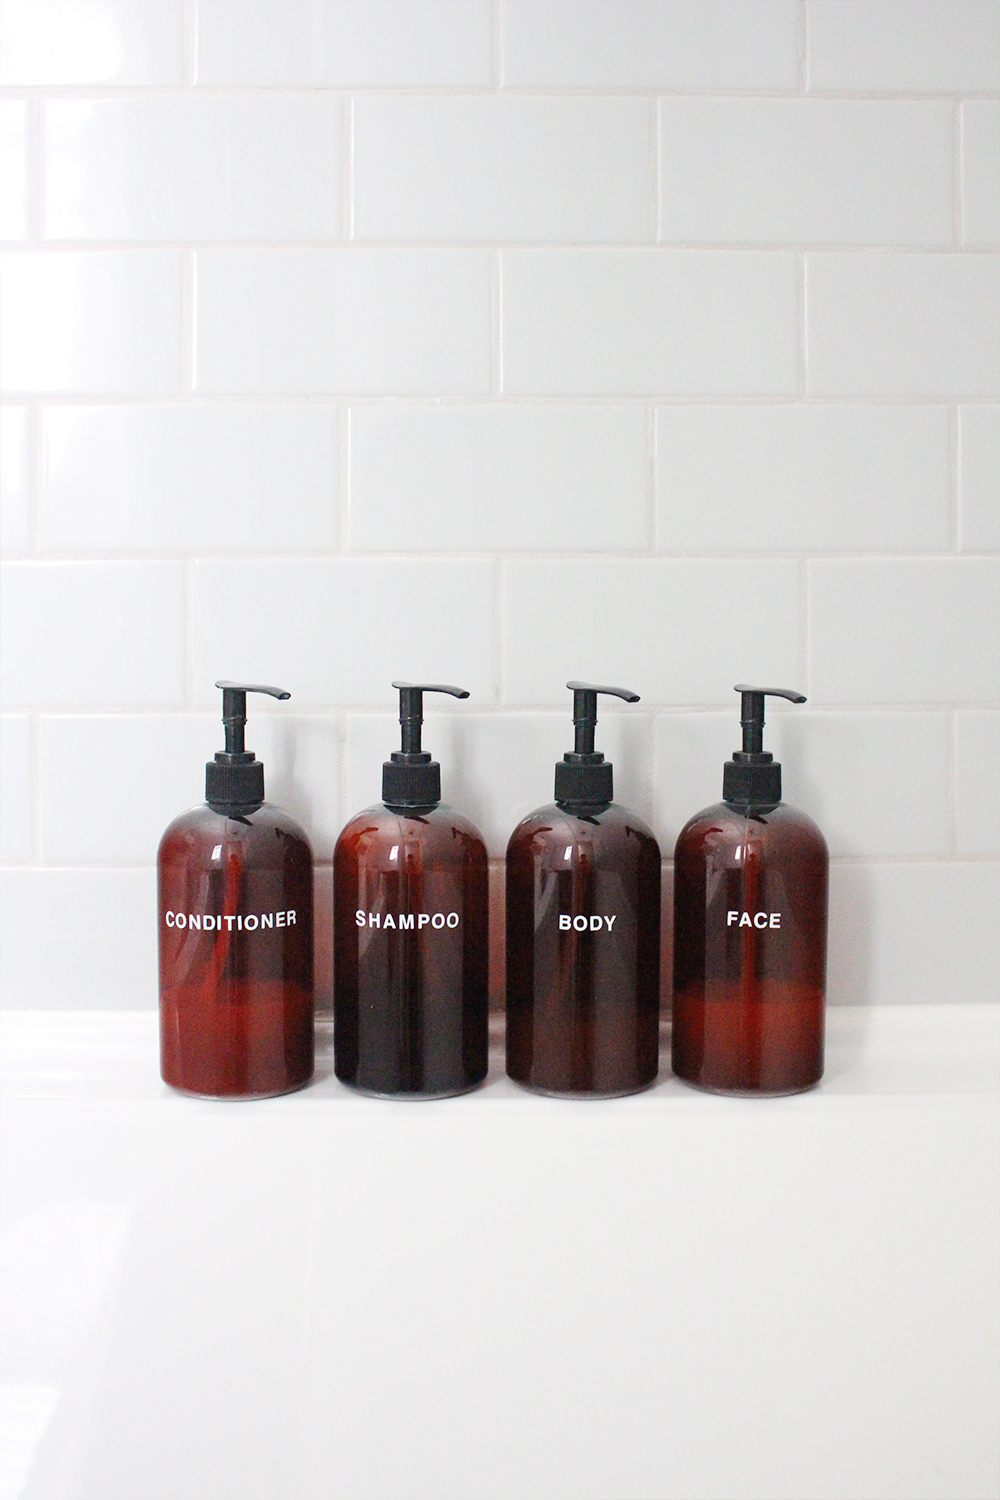
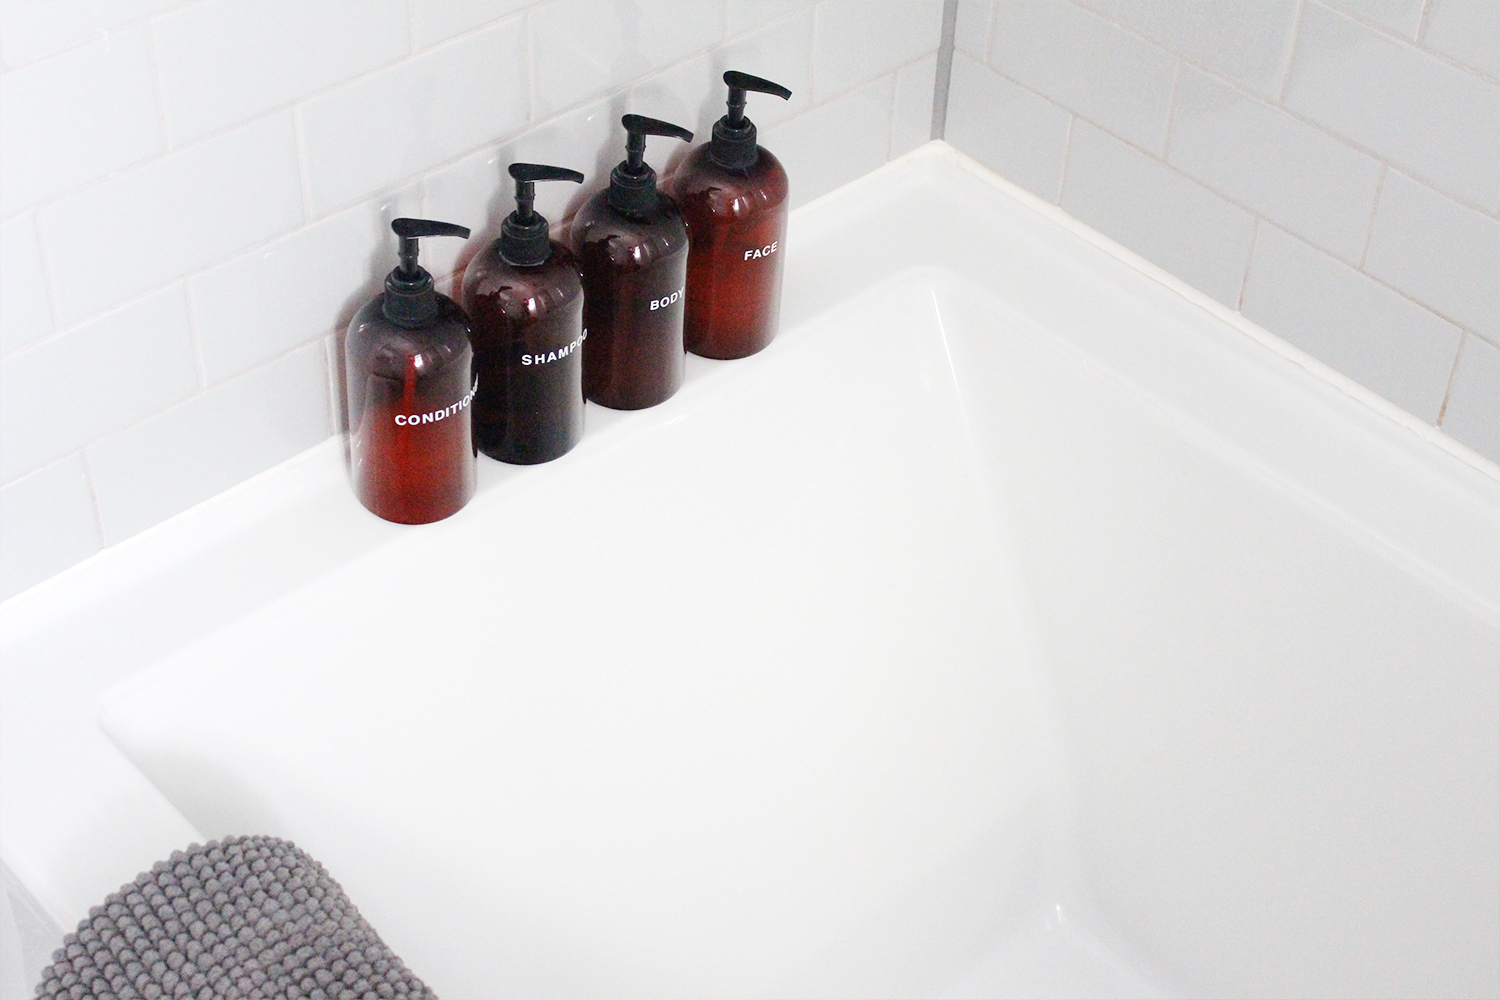
3 | Unity. I personally hate the visual (and actual) clutter created by different shampoo and soap bottles sitting on the shower ledge. I used a super simple DIY project to make a set of custom amber pump bottles and I love the result. It keeps the space clean and there is no fumbling around for the right bottle anymore.
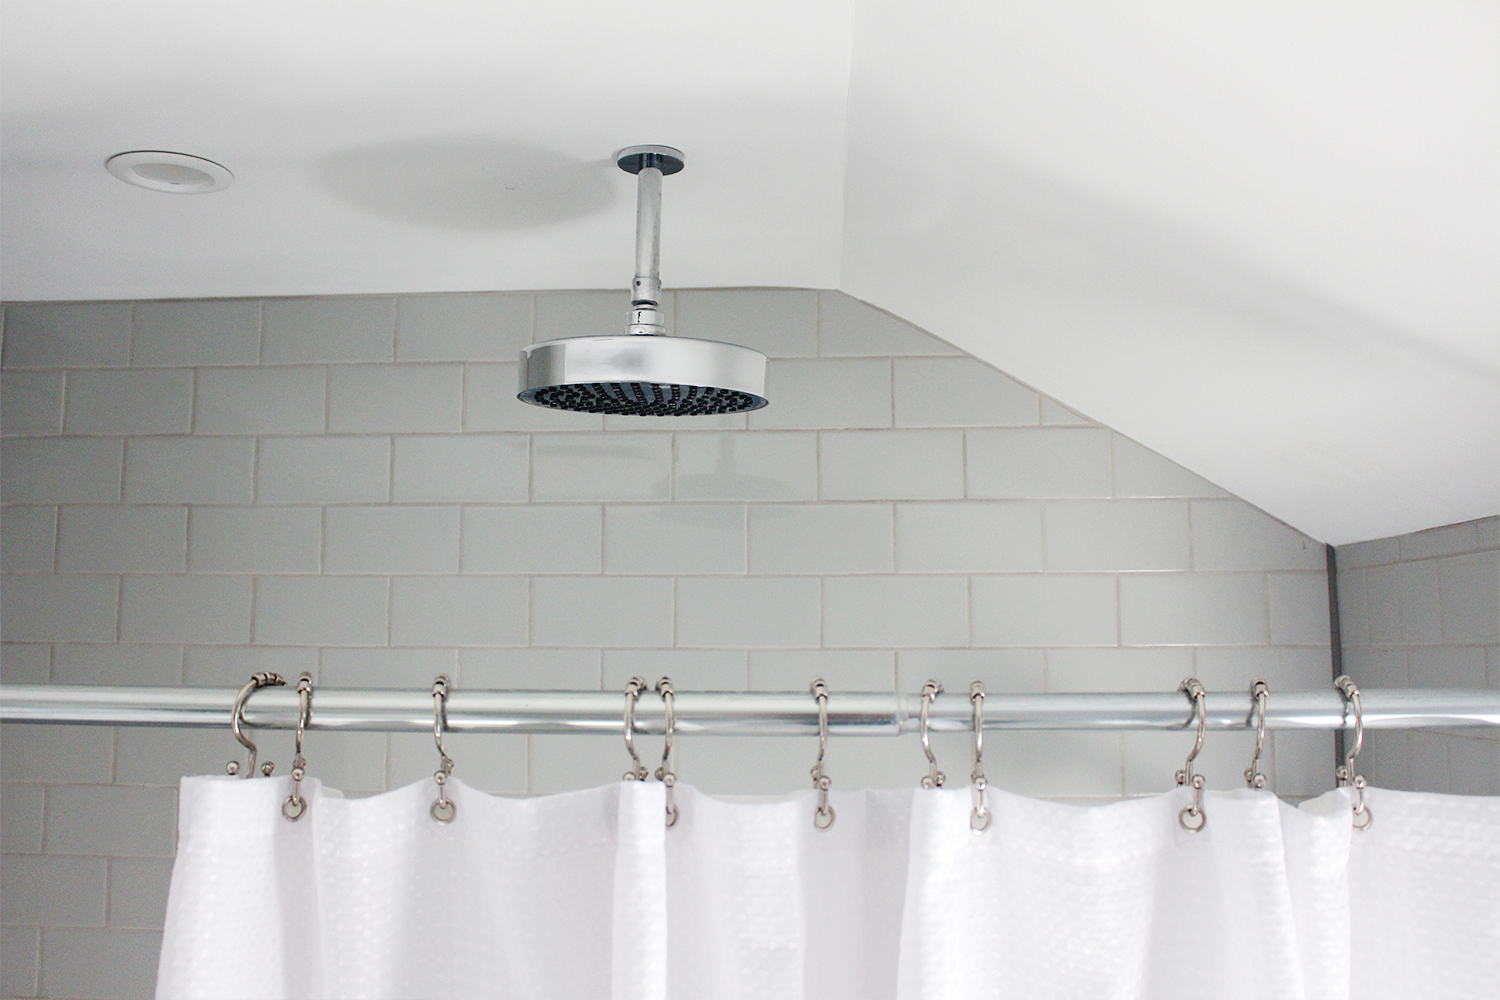
4 | The Rain Head. This was a must-have on our list and it’s been a life changing addition to my shower experience. I worried the pressure might not be strong enough but it’s fabulous and I like to pretend I’m in a waterfall in the jungle somewhere whenever I’m under it. Sorry, TMI!
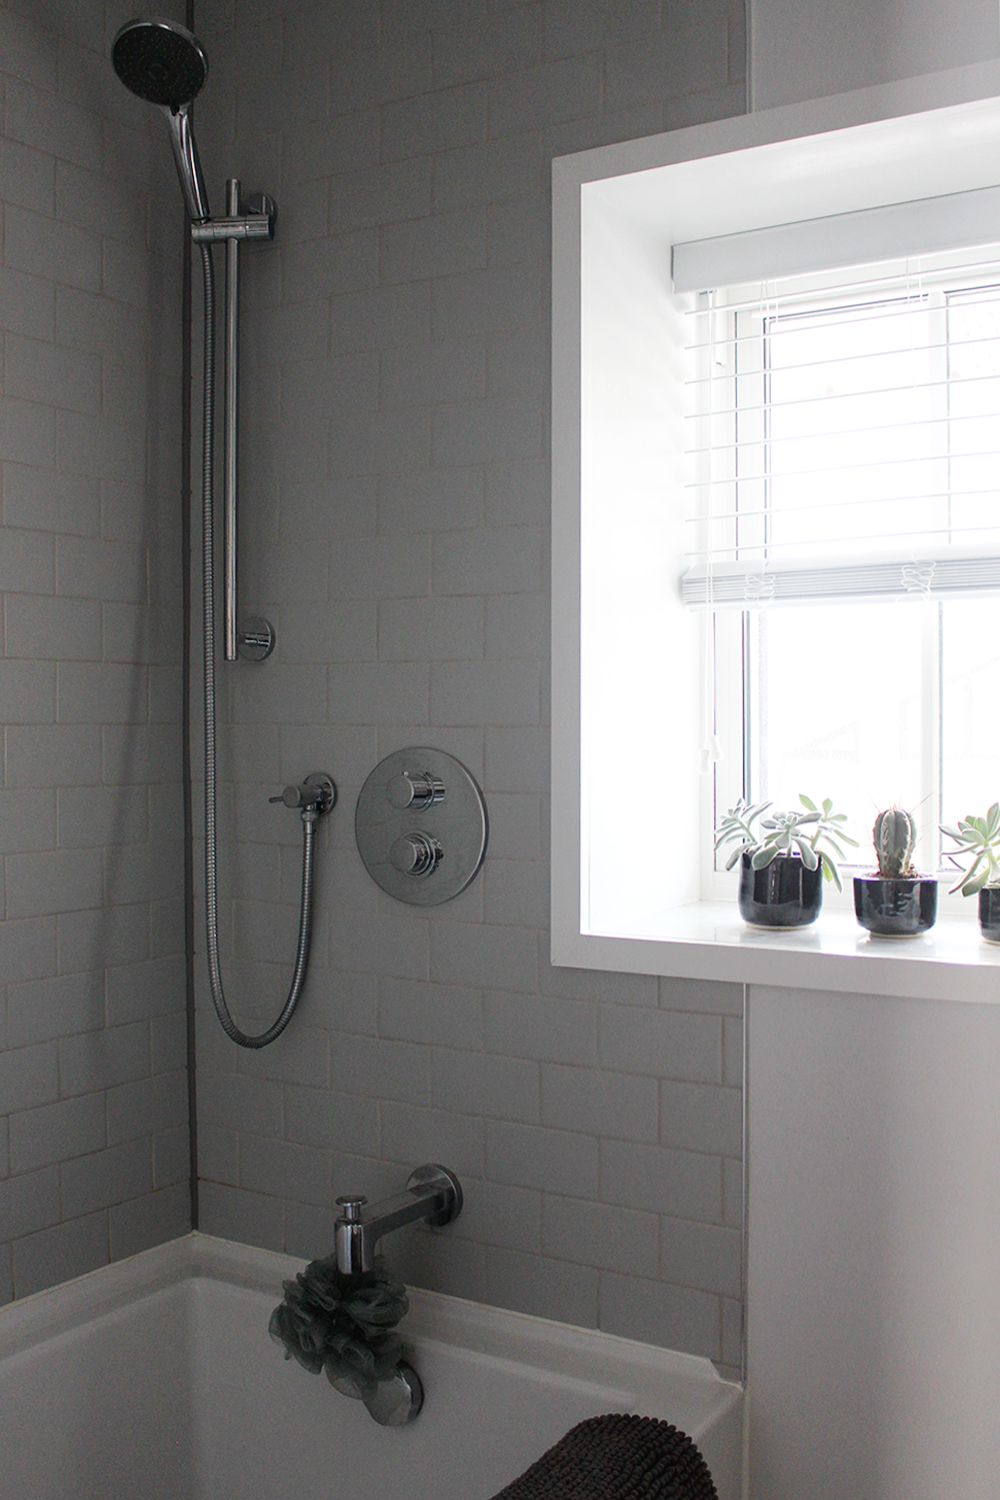
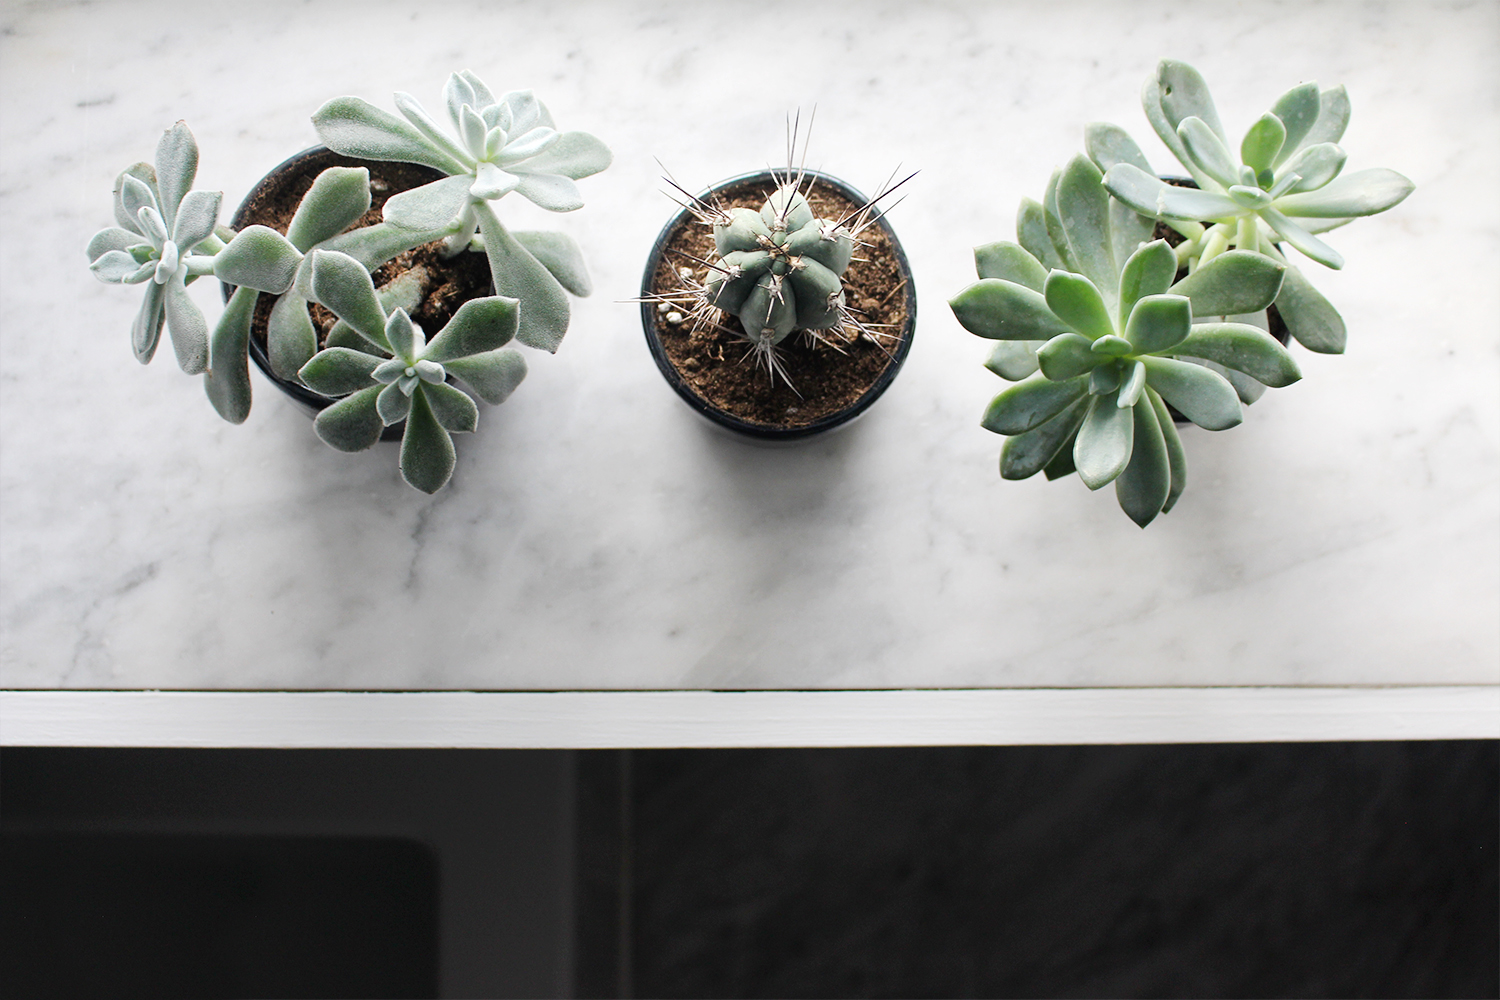
5 | Natural Light. We’re lucky that our bathroom had a beautiful big window space that gets lots of natural light (and no neighbours directly in view) but it was halfway into the shower, which of course isn’t ideal. We had to work around it but in the end I kind of love that it’s there. It’s a perfect home for a few succulents and a great spot to rest a speaker for shower jammin’! We carried the Carrara marble onto the sill for continuity and painted the rest to match the white trim and door.
6 | Details. With the space itself being very minimal and stark we needed to add a few small details to make it feel more personal. Things like handmade ceramics filled with the cutest green friends, a lovely piece of art from a family friend, fabulous Turkish towels and some super cute containers really helped make it more our own (it just took me forever to get them all!). I’m still debating a little shelf below the painting to display some pretty goodies on, what do you think?
So there you have it, a full tour of our tiny but complete master bathroom project! If we were starting over we might do a few things differently but ultimately we love the space and feel like the hard work really paid off. Now I’m off for a soak in the tub. Have a great weekend everyone!
SOURCES
Paint – Benjamin Moore – Seattle Gray
Mirror – IKEA
Sink – IKEA
Cabinet – IKEA
Storage – IKEA
Floor + Windowsill – Carrara Marble
Shower Tile – Standard Subway in Cool Grey
Toothbrushes – Need Supply
Silver Containers – Anthropologie
Painting – Stu Oxley
Toilet – Toto
Towels – ETSY
Soap Bottles – DIY via Almost Makes Perfect
Stained Glass Transom – Vintage
Bath Mat – IKEA


You have such a lovely home! We just finished a similar bathroom reno and I really want to finish it off with your idea of decanting products into simple containers. I live downtown Toronto and thought it would be easy to find plastic bottles – but no luck! Where did you find yours?
Thanks! xo
Thanks Christie! It’s definitely a work in progress but we’re loving it! I bought my bottles from Specialty Bottle but I’ve recently discovered Muji and love their selection! I used this DIY post to complete the project. Good luck! xo
Beautiful! I love the clear and simple bathroom design. For me it is very important that the bathroom is bright, that it has enough storage. I am planning to do a bathroom remodeling now in the spring and you give me really great ideas! Thanks for the post!
I love this space!! You have inspired me to streamline my own unsightly bottles in the bathroom. Question – Did you use an 8oz bottle for “hands” and 16 oz for the rest? Thanks! :):)
How do you deal with unsightly shaving cream bottles? I recently swapped out my shampoo, conditioner, etc for pretty bottles, too, but my can of shaving cream is still sitting in my shower taunting me.
This might be weird but I don’t use shaving cream…but here me out. A friend of mine once told me to try using conditioner instead and it changed my life! I get far fewer nicks and cuts and my skin never feels as dry as it did when I used shaving cream. So that’s how I avoid the shaving cream can, haha! I also keep my razor tucked away in a drawer that’s on my way into the shower so I grab it as I get in.
Gorgeous! I particularly like the idea of having those bottles. We are very minimal in the amount of products we use but I still dislike the visuals of shampoo bottle+face wash+soap. Will have to look into it over the weekend 🙂
Thanks so much! Streamlining the bottles changed my life! It still takes some effort to keep it from spiralling out of control again but I find it actually helps keep the space cleaner since they stay in one place. Such an easy, inexpensive way to make a big impact.
Absolutely beautiful transformation!! Question for you – we also have a window in our shower and I’m curious what kind of blinds you used? 🙂
xo
Ah, thanks so much Jessica! Means a lot coming from a design dynamo like you 🙂 We used 2 inch Faux Wood Bali Blinds from Blinds-To-Go. They are great and made specifically for high moisture spaces. Thanks again beauty! xo
Wow, this is amazing! Impeccably done!
Thank you so much Andrea! About to start tiling in our other bathroom, so it feels like this reno is never ending but it’s good to stop and take a look at what we actually have finished 🙂 xoxo
Looks so good- job well done Lee!
Thanks a lot Jodie! Feels great to be able to tick another room off the list 🙂 xo